Monday, February 2, 2015
New Blog Site
I have a new blog (and website) that can be found HERE. Please check it out! Have a great day!
Sunday, July 18, 2010
Bad Blogger
It's been a while since I've posted anything. It's been a busy time here...mostly due to my 'real job'. Periods like this make me appreciate even more the bloggers that seem to post every day or so. That's dedication!
I have wanted to buy a new extruder for some time now. The hard part was deciding which extruder to buy. I looked at several smaller ones including the four inch Northstar extruders. I have a friend who has a Big Blue. She's very happy with it and never worries about needing a larger extruder. Big Blues are quite expensive and I don't use an extruder that much. After thinking about it for months I decided to go ahead and get the Big Blue. It's....uh....big!
It arrived in two boxes:

I knew this thing was solid the minute I picked up the boxes. The larger box weighed over fifty pounds. As I unpacked it I could see the quality workmanship in this device. It's really put together well. I went to Lowes and got a small sheet of thick plywood and some lag screws. I mounted the wood to the wall studs in the studio and then mounted the Big Blue on the plywood. It's very sturdy and I should have no problems with stability. Here's what it looks like all setup:

It's a beast but I've used many different extruders before, including the Big Blue. No extruder out there allows a user to extrude clay as effortlessly as the Big Blue. Besides, if you're doing a lot of work it's the only one I know that holds an entire twenty-five pound pug of clay. While shopping around online I was amazed at the differences in price for the Big Blue. Some retailers were selling them for nearly $1000 plus shipping! I ended up getting mine for around $825 with no tax and shipping included. I was happy with that price.
I was in Orlando a couple of weeks ago and stopped by Axner. There were some new Mudtools plastic ribs there and I decided to buy a set.
I haven't used them yet but I'm sure I will in the near future.
I'm attending a workshop on 'spraying glazes' at the Jacksonville Art Center in Floyd, Virginia next week. It's being taught by Chris Lively. You can check out his website here. The workshop takes place Monday through Wednesday. I'm going to fly from Orlando to Charlotte on Saturday and spend Sunday in Seagrove. Then it's a flight back Wednesday night and work Thursday morning! Quick trip but I hope it's worth it.
That's all for now...I have bisqued pots in the kiln that need to be removed. I will post pictures from the workshop next week.
Sunday, June 6, 2010
New Cups, Tumblers, and Glazes
I spent yesterday making a few more mugs. Today was spent adding handles. I have been struggling for some time now with trying to come up with a mug that I'm happy with. When I say 'happy' I'm referring, specifically, to it's shape. I've thrown mugs of all shapes and sizes and never seem to be happy with their structure. I don't want one with vertical straight walls. Nor do I want too much of a curve to the wall. I also don't want one too tall or too short. It's been very difficult to come up with 'my shape'. I think I've finally found one I like:

I know non-potters reading this will think, "That's a lot of thought for a simple mug." True, but you can learn a lot from a mug. Click HERE to hear Pete Pinnell's thoughts on the mug. Very inspiring and educational...

I also played around with making large tumblers. These were a lot of fun to make. Not very difficult - just pulling a tall cylinder and widening it a little toward the top. The simplicity, in my opinion, can also be very deceiving. The devil is in the details - the throwing lines, the way the foot and rim is constructed, the alterations made to the otherwise vertical sides. I see lots of tumblers that I do not like at all. The tumbler is one of those forms that I find very challenging to throw - from a like/dislike perspective. I can love a simple looking tumbler and dislike a more complex one....and vice versa. Here are a few I threw yesterday:

I think the next time I'm inspired to throw tumblers I'm going to play around with the foot a little. Perhaps flare it out some to add width to the base.
On to glazes...I'm in the process of mixing up batches of text glazes for the reduction kiln. Over the winter my father collected a large amount of ash from their fireplace (oak). I have several wood ash glazes I plan to try. Anyone have any favorite wood ash glaze formulas they would like to share?
Sunday, May 30, 2010
Foam Trimming Bat
During a recent workshop in Atlanta the topic of the Giffin Grip and trimming came up during lunch. Several attendees expressed their love for the Giffen Grip. I have a Giffin Grip and I too find it very useful. However, if the pot is not perfectly centered I find that trimming can be a little challenging. I explained that I sometimes use the Giffin Grip but that most times I use my foam bat for trimming. I received an email asking me how I made the foam bat. In case anyone else is looking for an alternative for trimming I'm posting the information here.
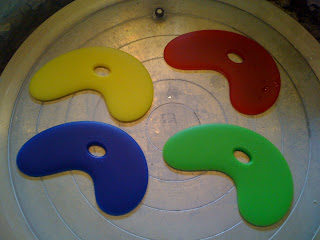
I went to a local cloth store and bought a couple of square yards of green half-inch this foam:

I cut the foam in the approximate shape of the bat - being careful to make it about an inch or two bigger than the bat. **You do NOT want to cut it too small**. I used a pressboard bat since I stopped using them some time ago for throwing (I found they warped when wet).

I sprayed a heavy coating of adhesive on the surface of the bat. I used standard adhesive that comes in a spray can (like spray paint) that you can get at Lowe's or Home Depot. I placed the cut-out foam on top of the bat and pressed down to ensure the entire surface of the foam mat was in contact with adhesive. I let that sit overnight. The next day I cut the foam with scissors to match the shape of the bat.
View from underneath:

View from above:

The lines you see on the foam are guides to help center. I used a Sharpie pen to do this. The bat was place on my wheel and I started it spinning at about the speed I use to center clay. I held my hand very steady (using my leg as a brace) and placed the pen on the foam bat near the center. After the first circle was complete I lifted the pen, moved it out approximately one-half inch and repeated the process until I reached the end of the foam. The centering lines have really helped and I highly recommend them.
I quickly discovered that I needed to trim pieces that were larger than the bat pictured above. While in St. Petersburg I stopped by The Highwater Clay store at St. Pete Clay and bought a large bat (3/4" thick by 22" wide). I used this bat to make a larger foam bat to trim. Here it is:

From the side showing the thickness...

Tips for centering your pot:
- I place the pot in the center of the bat and get it as close to the nearest marking as possible.
- I start the wheel turning very slowly and place my finger near the bottom of the pot.
- As the wheel head turns you will be able to judge how centered it is. Stop the wheel and adjust accordingly.
- Once centered push down on the pot to help stabilize it.
I can usually center a pot on the foam board in about 30 seconds. I like using it so much for trimming that I only use the Giffin Grip when I have to.
Good luck and I hope this explanation has helped!
Thursday, May 27, 2010
New Tumblers
I've made a lot of mugs throughout the years but never tumblers. I've always liked tumblers, but never made the time to try throwing the form. Yesterday I decided it was time to make a few:

What do you think? I'm happy with them. Now I'm thinking about what glaze(s) to use. I might try the same glaze combination I use on mugs: a liner glaze that turns out a very light blue and a fake ash glaze on the outside that is applied thicket toward the top so there's a small amount of running.
Any suggestions?
Monday, May 24, 2010
Getting Ready to Fire
For months I have been promising myself that I would take a day to make a bunch of mugs. I always found that I had other things on the agenda and the mugs got pushed to the end of the list. This weekend I stopped procrastinating and Saturday was 'Mug Day'. I threw about three dozen of them.
I found that setting them out back on the kiln in full sunlight drastically cut down the time I had to wait until they were ready for handles. No more covering them overnight with plastic, checking every few hours, etc. About an hour or so in the Florida sun and they're ready to go...

It's much less time consuming for me to throw a few dozen mugs, set them outside, and start putting handles on them an hour or so later.
This coming weekend I will be bisquing a full load in the electric kiln. Finding the time to bisque fire is tough for me. I will not leave the electric kiln on while I'm away. Also, I like to monitor it just in case something goes wrong (see my earlier post). I'm paranoid about the possibility of a fire. I might be too paranoid, but I usually play it safe when it comes to having something at 2000 degrees that's pulling 40+ amps. Due to all of this, I have to be home during the firings. This mean I have to find a weekend where I will be at home during the entire firing. That's easier said that done. This weekend my band is playing Friday night and Sunday night...so it's Saturday or bust.
Next weekend I plan on doing a raku firing. Michael Nagy, someone I met at the Charlie and Linda Riggs Workshop, lives in Tampa. He is going to drive up and do the firing with me. He is considering purchasing a clamshell raku kiln (like I have) and wants to see how it performs. I plan to try out the one-step naked raku technique I learned at the Riggs Workshop.
That's all for now. Enjoy your day!
Thursday, May 20, 2010
Vases, Vases, and More Vases
I've been throwing a ton of vases lately. I have a commission (my first) to produce a vase. Here's the latest batch:

I plan on using the one-step raku process on these vases that I learned at the Riggs' Workshop earlier this month in Atlanta. Click HERE to see videos I took during the workshop.
Subscribe to:
Posts (Atom)


